Practice Gap
Dermatology residents can struggle with surgical closure early in their training years. Although experienced dermatologic surgeons may intuitively be able to align edges for maximal cosmesis, doing so can prove challenging in the context of learning basic surgical techniques for early residents.
Furthermore, local anesthesia can distort cutaneous anatomy and surgical landmarks, requiring the surgeon to reexamine their closure technique. Patients may require position changes or may make involuntary movements, both of which require dynamic thinking and planning on the part of the dermatologic surgeon to achieve optimal outcomes.
The Technique
We propose the use of sutures to intraoperatively guide placement of the dermal needle. This technique can be used for various closure types; here, we demonstrate its use in a standard elliptical excision.
To begin, a standard length to width ellipse ratio of 3:1 is drawn with appropriate margins around a neoplasm.1 After excision and appropriate undermining of the ellipse, we typically use deep sutures to close the deep space. The first pass of the needle through tissue can be performed in a place of the surgeon’s preference but typically abides by the rule of halves or the zipper method (Figure 1A). To determine optimal placement of the second needle pass through tissue, we recommend applying gentle opposing traction forces to the wound apices to approximate the linear outcome of the wound edges. The surgeon can use a skin hook to guide placement of the needle to the contralateral wound edge in an unassisted method of this technique (Figure 1B). The surgeon’s assistant also can aid in applying cutaneous traction along the length of the excision if the surgeon wishes to free their hands (Figure 1C). Because the risk of needlestick injury at this step is small, it is prudent for the surgeon to advise the assistant to avoid needlestick injury by keeping their hands away from the needle path in the surgical site.
Although traction is being applied to the wound apices, the deep suture should extend across the wound with just enough pressure to leave a serosanguineous notched mark in the contralateral tissue edge (Figure 1D). After releasing traction on the wound edges, the surgeon can effortlessly visualize the target for needle placement and make a throw through the tissue accordingly.

FIGURE 1. A, First pass for interrupted dermal stitch with dissolvable suture for defect repair. B, Unassisted wound edge approximation utilizing the skin hook unidirectional traction method for contralateral wound edge suture mark (arrow highlighting directional forces). C, Assisted wound edge approximation utilizing a surgical assistant for bidirectional wound apices traction method for contralateral second pass suture location (arrows highlighting directional forces). D, Serosanguineous notched mark (arrows).
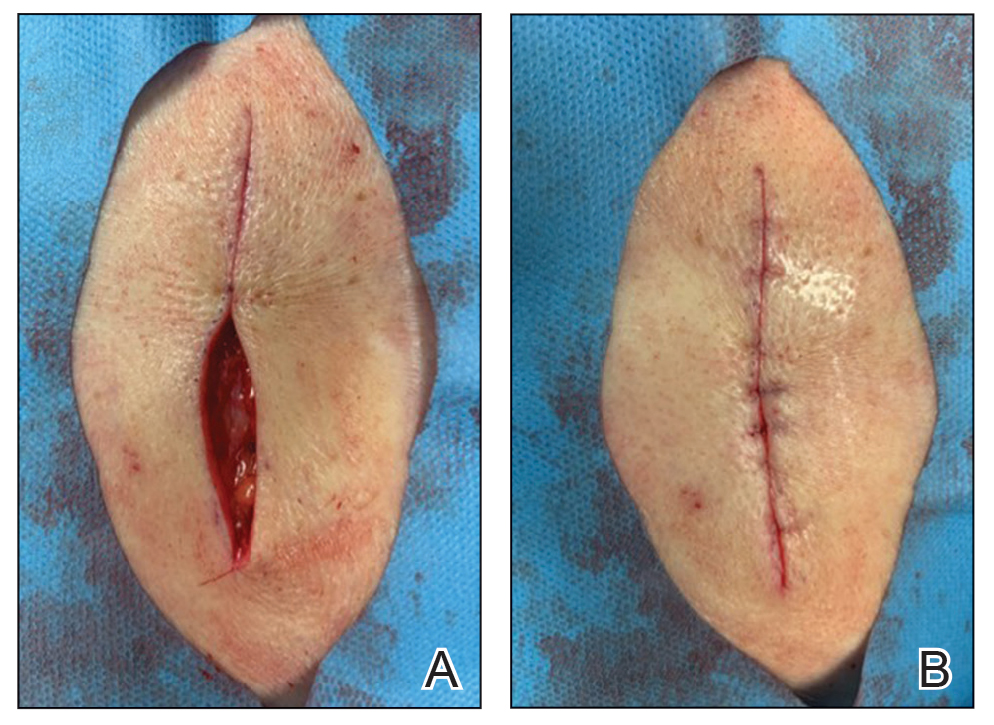
This process can be continued until wound closure is complete (Figure 2). Top sutures or adhesive strips can be placed afterward for completing approximation of the wound edges superficially.
Practice Implications
By using this technique to align wound edges intraoperatively, the surgeon can have a functional guide for needle placement. The technique allows improvement of function and cosmesis of surgical wounds, while also accounting for topographical variations in the patient’s surgical site. Approximation of the wound edges is particularly important at the beginning of closure, as the wound edges align and approximate more with each subsequent stitch, with decreasing tension.2
In addition, when operating on a curvilinear or challenging topographical surface of the body, this technique can provide a clear template for guiding suture placement for approximating wound edges. Furthermore, local biodynamic anatomy might become distorted after excision of the tissue specimen due to release of centripetal tangential forces that were present in the pre-excised skin.1 Local change in biodynamic forces may be difficult to plan for preoperatively using other techniques.3
Although this technique can be utilized for all suture placements in closure, it is of greatest value when placing the first few sutures and when operating on nonplanar surfaces that might become distorted after excision. To ensure the best outcome, it is important to be certain that the area has been properly cleaned prior to surgery and a sterile technique is used.


